QUARANTINE
Motorcycle Electrical Problems - Part Two
My new battery came in pretty quickly, but the regulator/rectifier took several weeks! My poor bike was exploded the whole time. I’m grateful it didn’t rain.
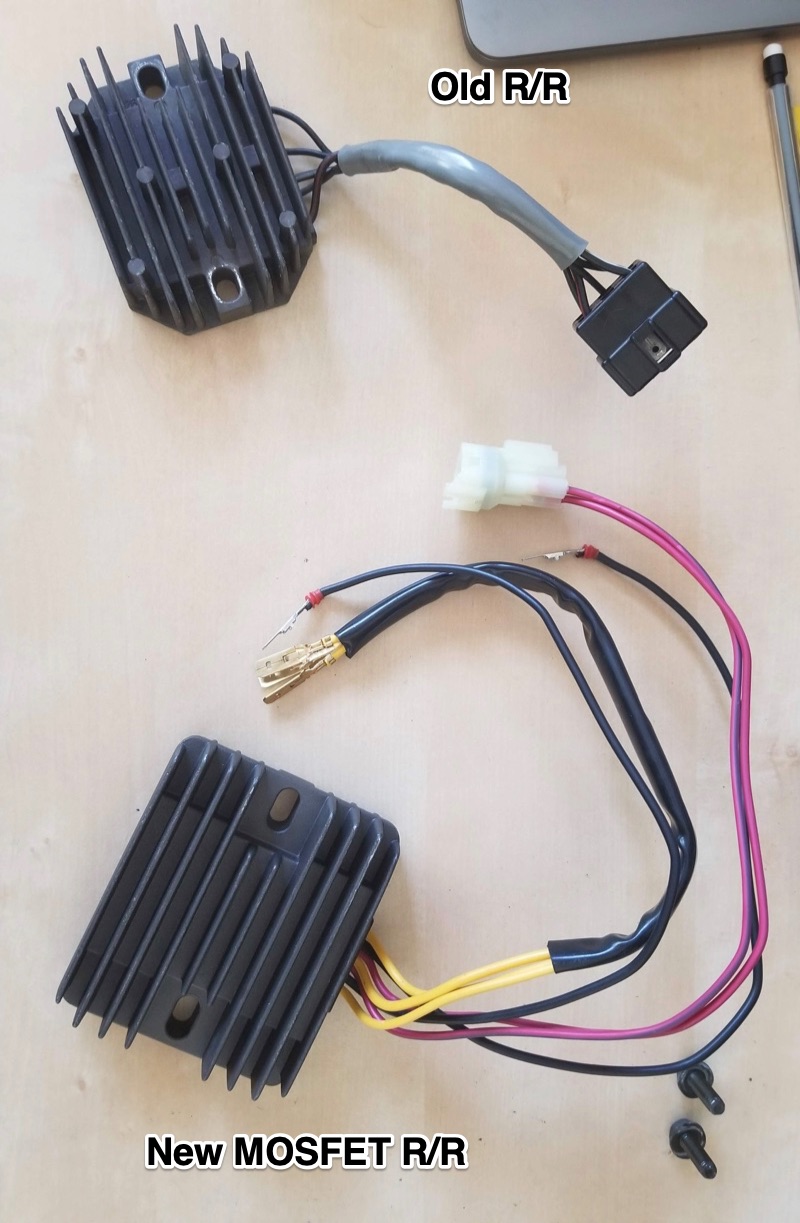
So the first thing is that the wiring and plugs for the new R/R didn’t match the wire and plugs for my stator wire plug. You can see the old R/R has a single wire plug and in fact only has 5 wires coming out of it. The configuration is 3 ground wires in a row, then a positive and a negative phase wire.
The new R/R has three ground wires (the same size paddles even) which you can see as the loose yellow wires. However, it has four positive and negative wires.

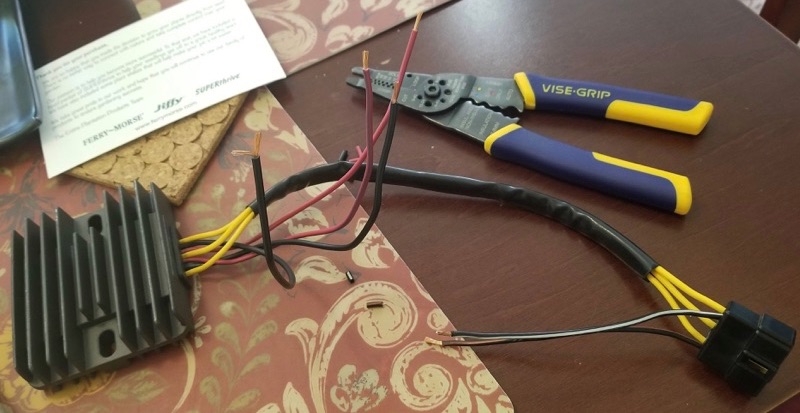
So the task for me was to a) get the wires of the new R/R into the old R/R’s plug, and b) splice the positive and negative wires to fit as well. Thankfully the ground wires just popped out of the new plug and fit right into the old plug.
I used wire strippers to take off about a pinky nail’s worth of wire wrapping on the remaining six wires. Note that I cut the wires of the old regulator off at the base, and cut the wires of the new regulator in half. I wanted a good amount of runway in case I screwed anything up, but Sam also recommended I leave the new R/R plug in usable shape in case it came up later.

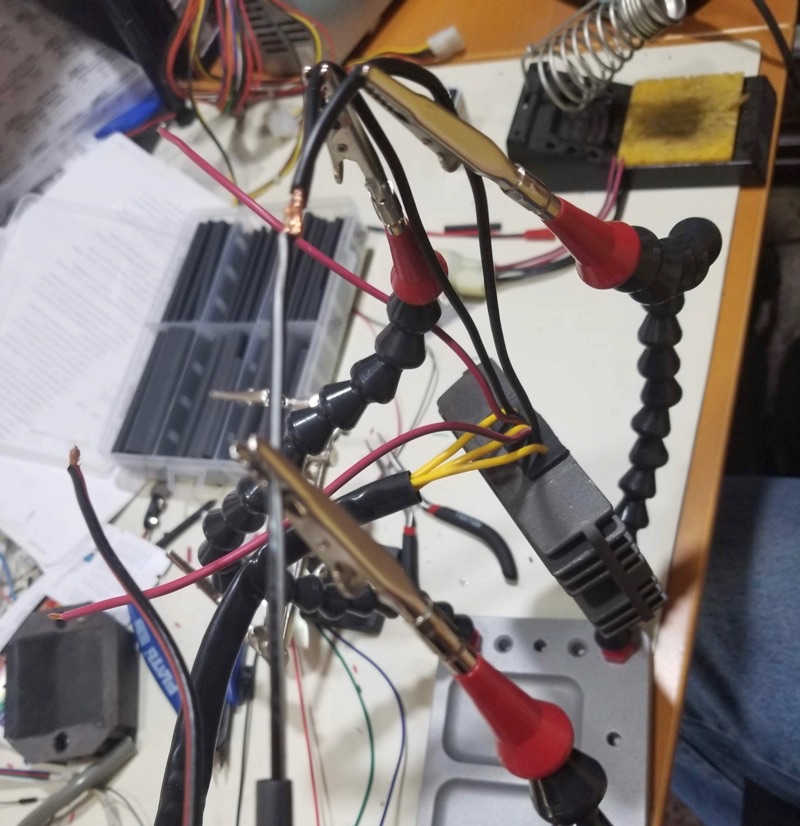
To connect the wires together we used something Sam called the NASA splice. When splicing three wires together, you take the side with two wires and hold them side by side. You rest the third opposite wire on top of that wire raft, then solder the whole thing together. Sam has a whole work area dedicated to this, including some creepy tentacle helping hands.
Probably important to mention at this juncture to SOLDER THE RIGHT WIRES TOGETHER! We were connecting positive to positive and negative to negative. You really don’t want to mess this up! Check the wiring diagram of your regulators, and check the wire color! It’s a little hard to see in the photo but we’re splicing black-black-black/white and red-red-black/red.

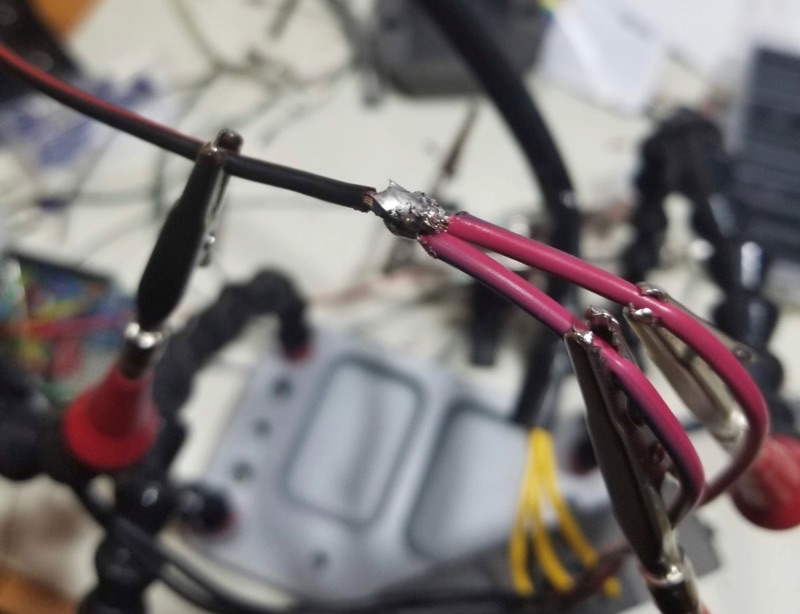
Sorry the photo is out of focus! So don’t forget if you’re going to use shrink wrap to cut it to about 3 times the length of the exposed wire and to slip it on the single wire before soldering! The creepy tentacle arms can be articulated which allowed us to painstakingly line up all three wires together. For solder you want an even coating that “soaks in” to the wires, binding them together. I can’t tell you how to solder because it was my first time and I only did it for one of the joins, Sam had to show me how on the first. But he said I didn’t do too badly on my first try! It was somewhat challenging wrapping my head around getting the solder on the bottom of the wires but you can kinda rub it around with the iron.

Finally, waterproof the connection by wrapping it in our case, heatshrink. It was pretty dope blasting it with a heat gun and having it shrink perfectly to size and shape! I’d upload a video but I’m not exactly using S3 space wisely as it is. Also, make sure to wait for the solder to be cool to the touch before trying to push the heatshrink over the bond! Wouldn’t want it to shrink prematurely.
So thankfully the bolts for the old R/R and the spacing on the frame was fine for the new R/R. I’ve heard some people say the new regulators were too physically large to fit under the fairings and they moved them to under the seat. While that would be more convenient than tearing off the rear fairings next time this stops working, I was lucky enough that the fairings fit (albeit snugly) over it. I grabbed my new battery which was plug and play and got that in, put the fairings and seats back on and started the bike right up! I need to test the battery voltage - if it’s 14V that means it’s charging while the bike is running and I can move on to my other projects!